")


Some of the articles on Casa Diem Life may contain affiliate links. If you click and make a purchase, I might earn a small commission at no extra cost to you. It's just one way we keep the journey going! Find out more in my Privacy Policy.
After being chastised repeatedly for “never resting” by my well meaning friends and family, I resolved not to make any changes to the house for one whole month!
Nine days into my resolution, however, I happened to step on a lego for the last <bleeping> time. Screaming in pain as I stumbled across the living room, I caught sight of one of the last blank-ish walls in our common area, and an idea was born.
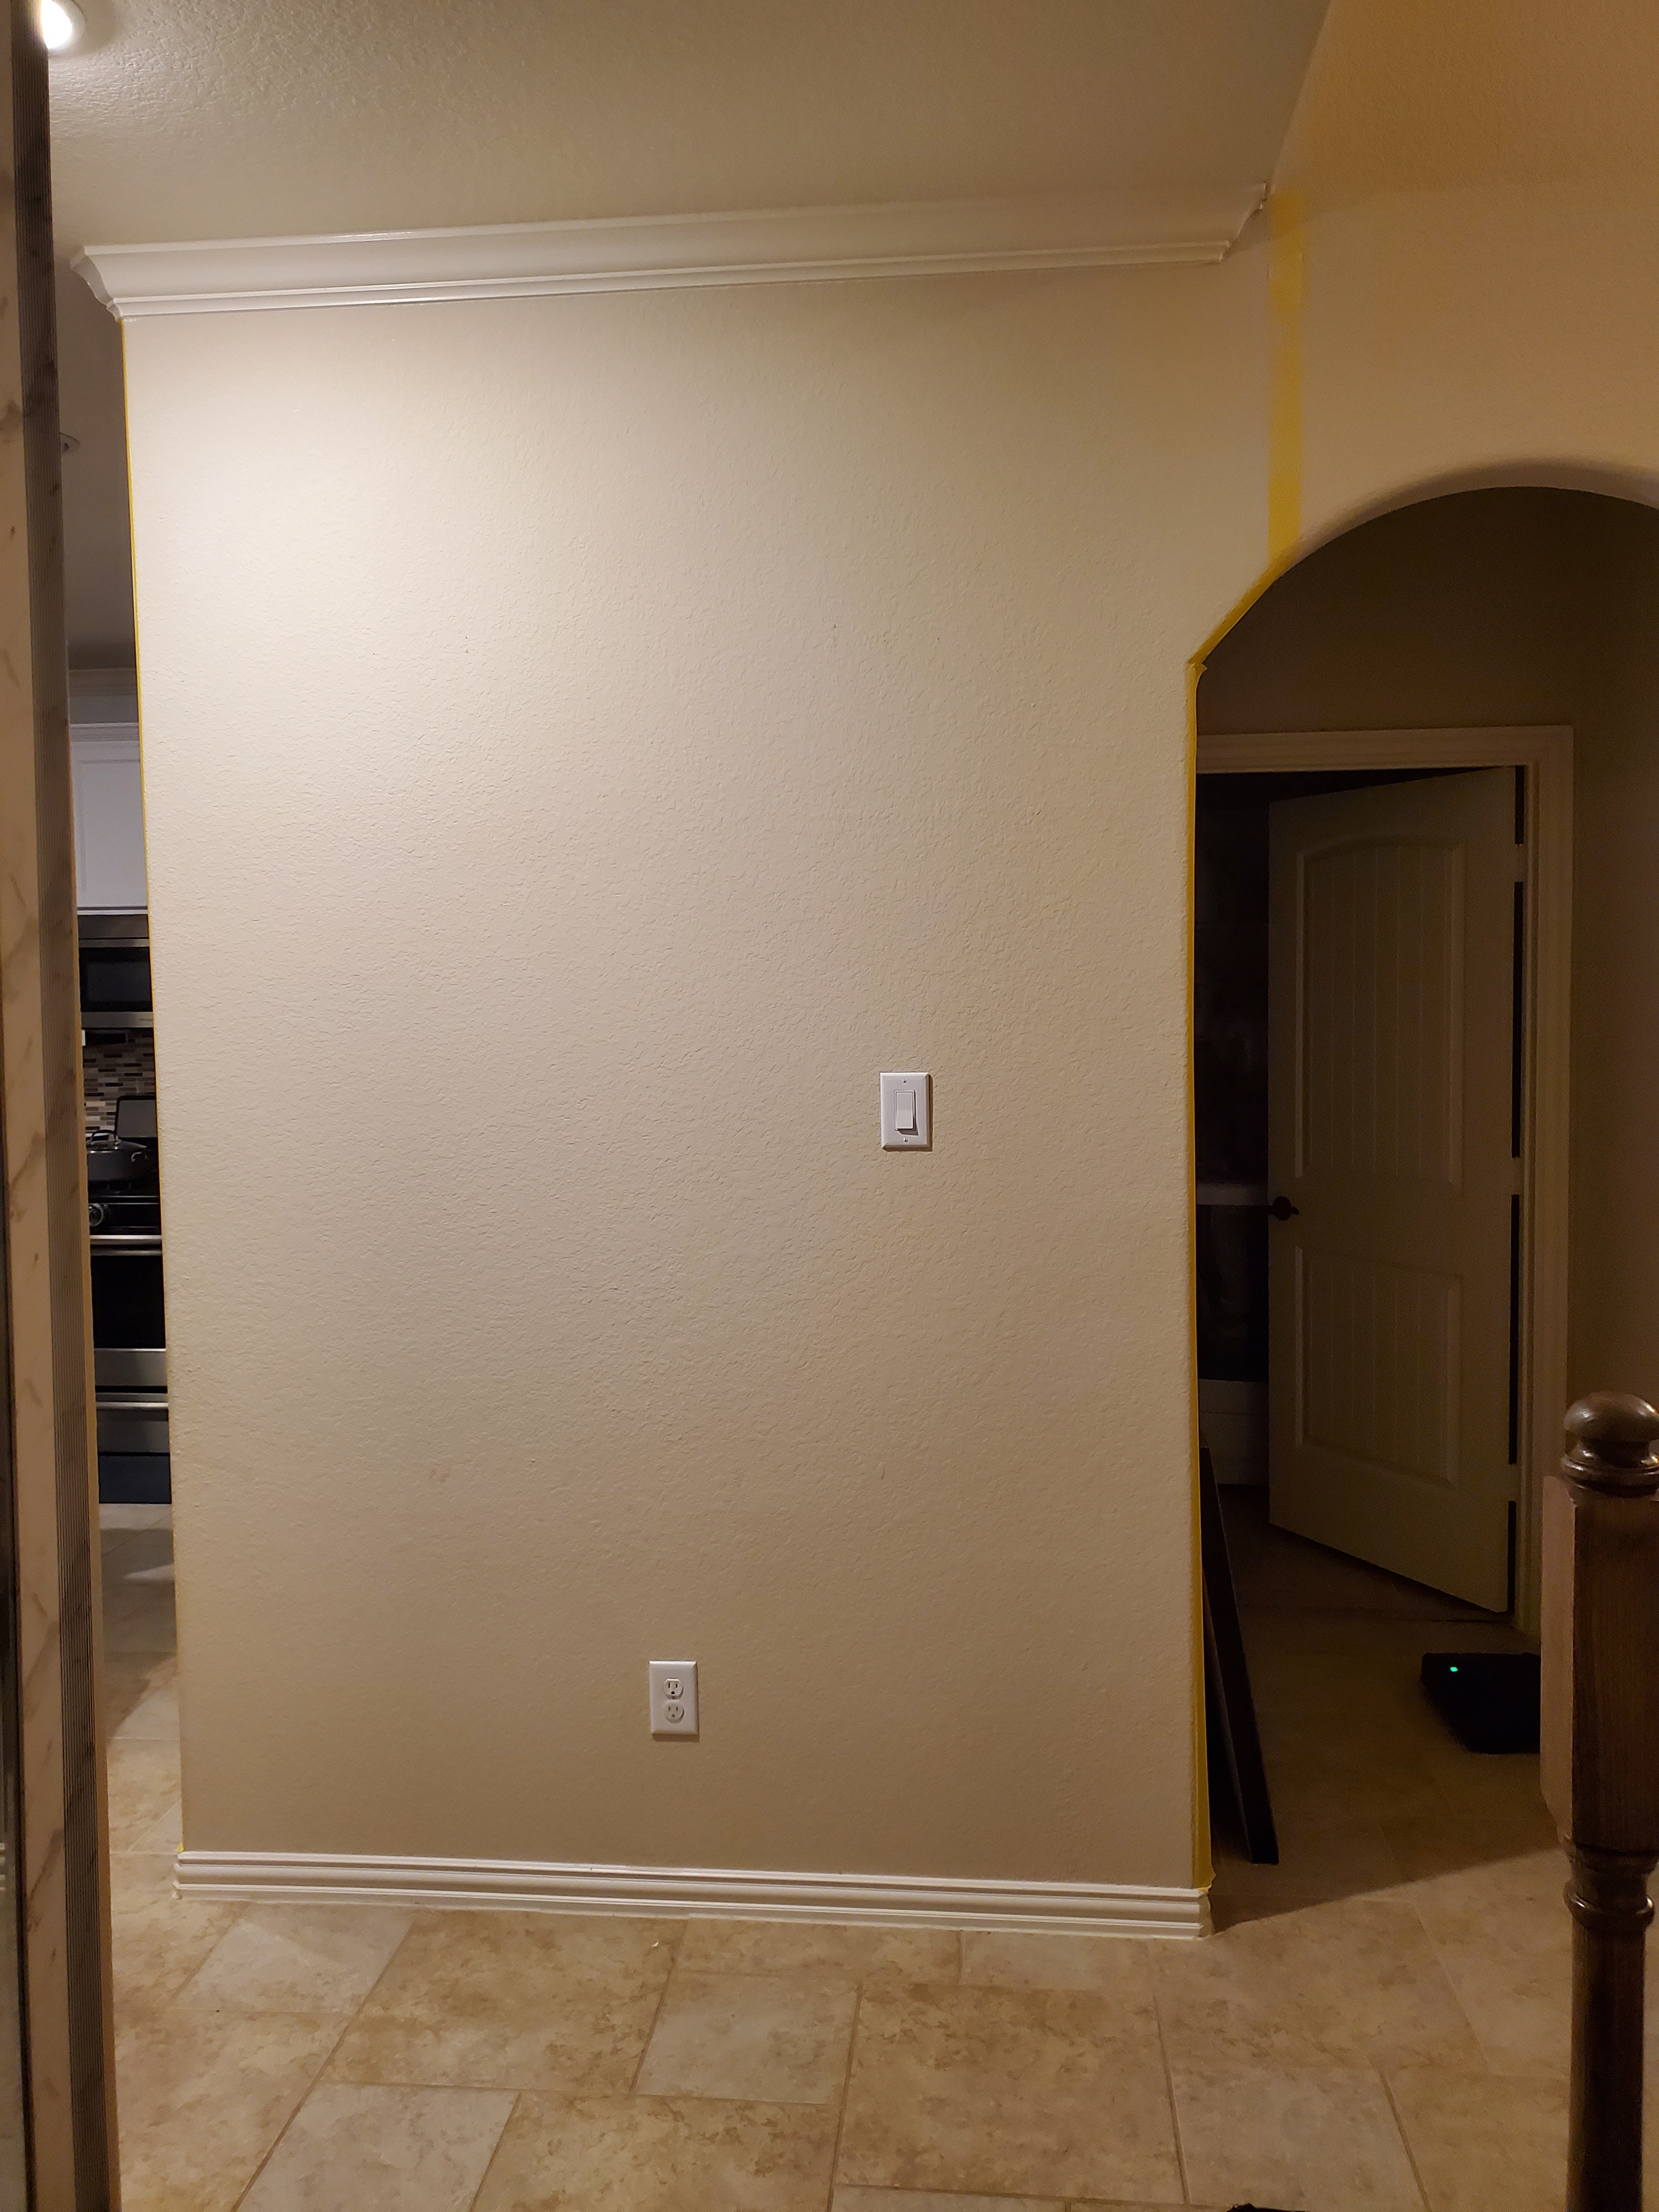
The situation: Despite having a dedicated playroom upstairs, Hurricane and Chief insist on bringing toys downstairs to play.
The problem: Bedtime is a frenzy and the kids forget to tidy up before heading upstairs. Yes, our 11 month old tidies up! He’s perfectly capable… when he’s in the mood.
The outcome: Bare feet on legos –> colorful adult language –> the realization that we need some gorgeous adult storage to hide our hideous, childish mess.

Feeling excited and ambitious, I immediately started sketching ideas for custom floor-to-ceiling cabinetry with integrated adaptive lighting and perhaps a pull-down wine bar.
But then I remembered that I’m a wife and mother of two, and there are only 24 hour in a day ( 9 of which are sacrificed donated beholden to Corporate America). In the interest of time, I decided to make this project an Ikea Hack.
The next morning I ran off to Ikea before MisterE could ask too many questions. He knows when the winds of change are blowing through our house, and he sometimes tries to talk sense into me. It’s adorable, really, but it eats into the remaining 15 hours of my day
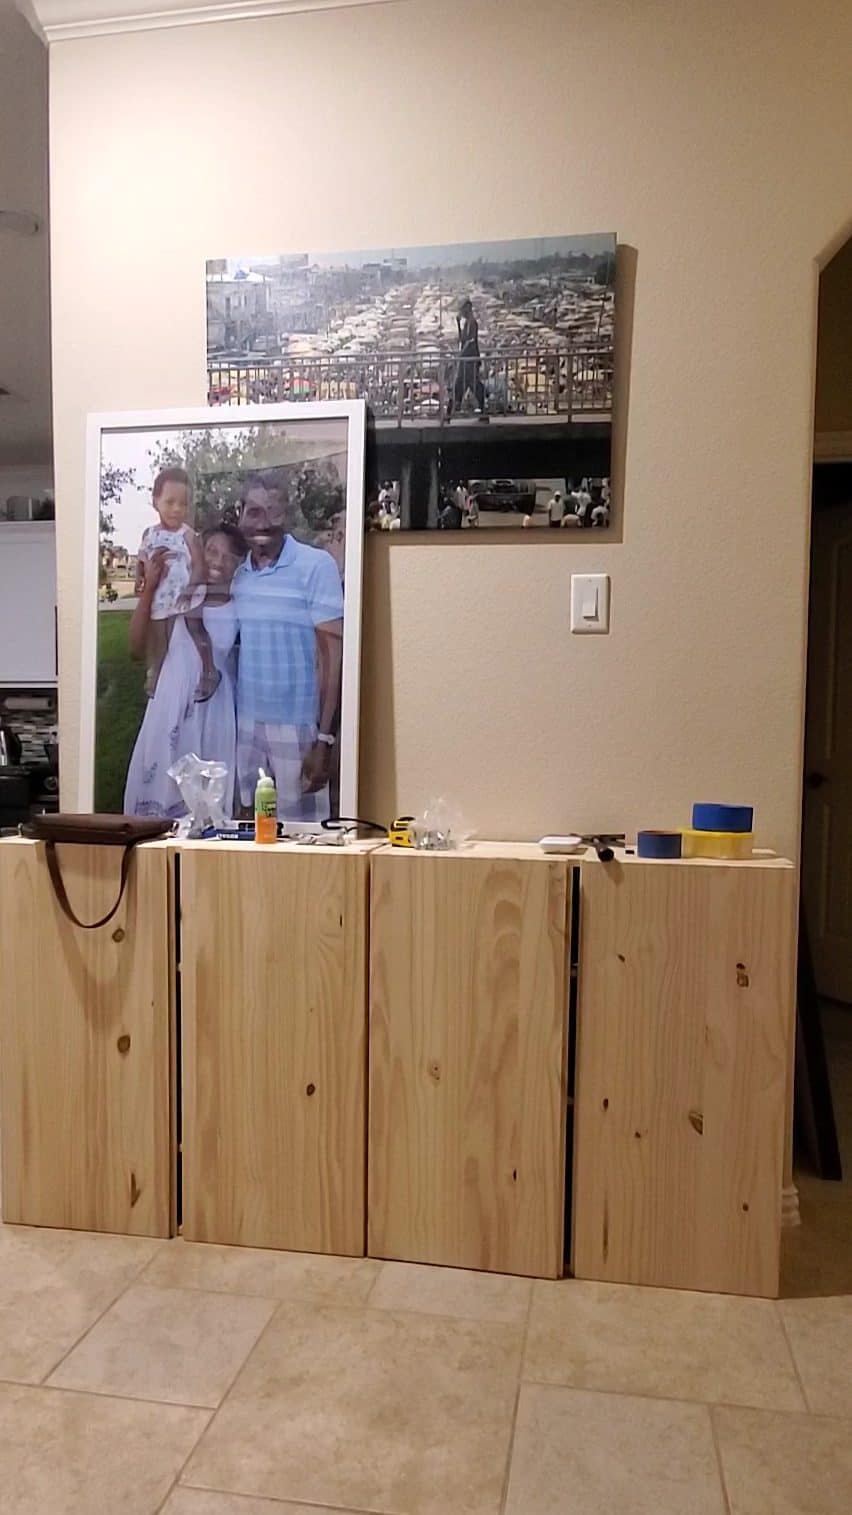
At Ikea I bought two IVAR cabinets and nothing else, I swear.
I wish I could tell you that there was divine inspiration for the monochromatic look I chose. The truth is I was too lazy to leave the house again, and I had leftover paint from redoing my den. Inspiration comes in many forms.
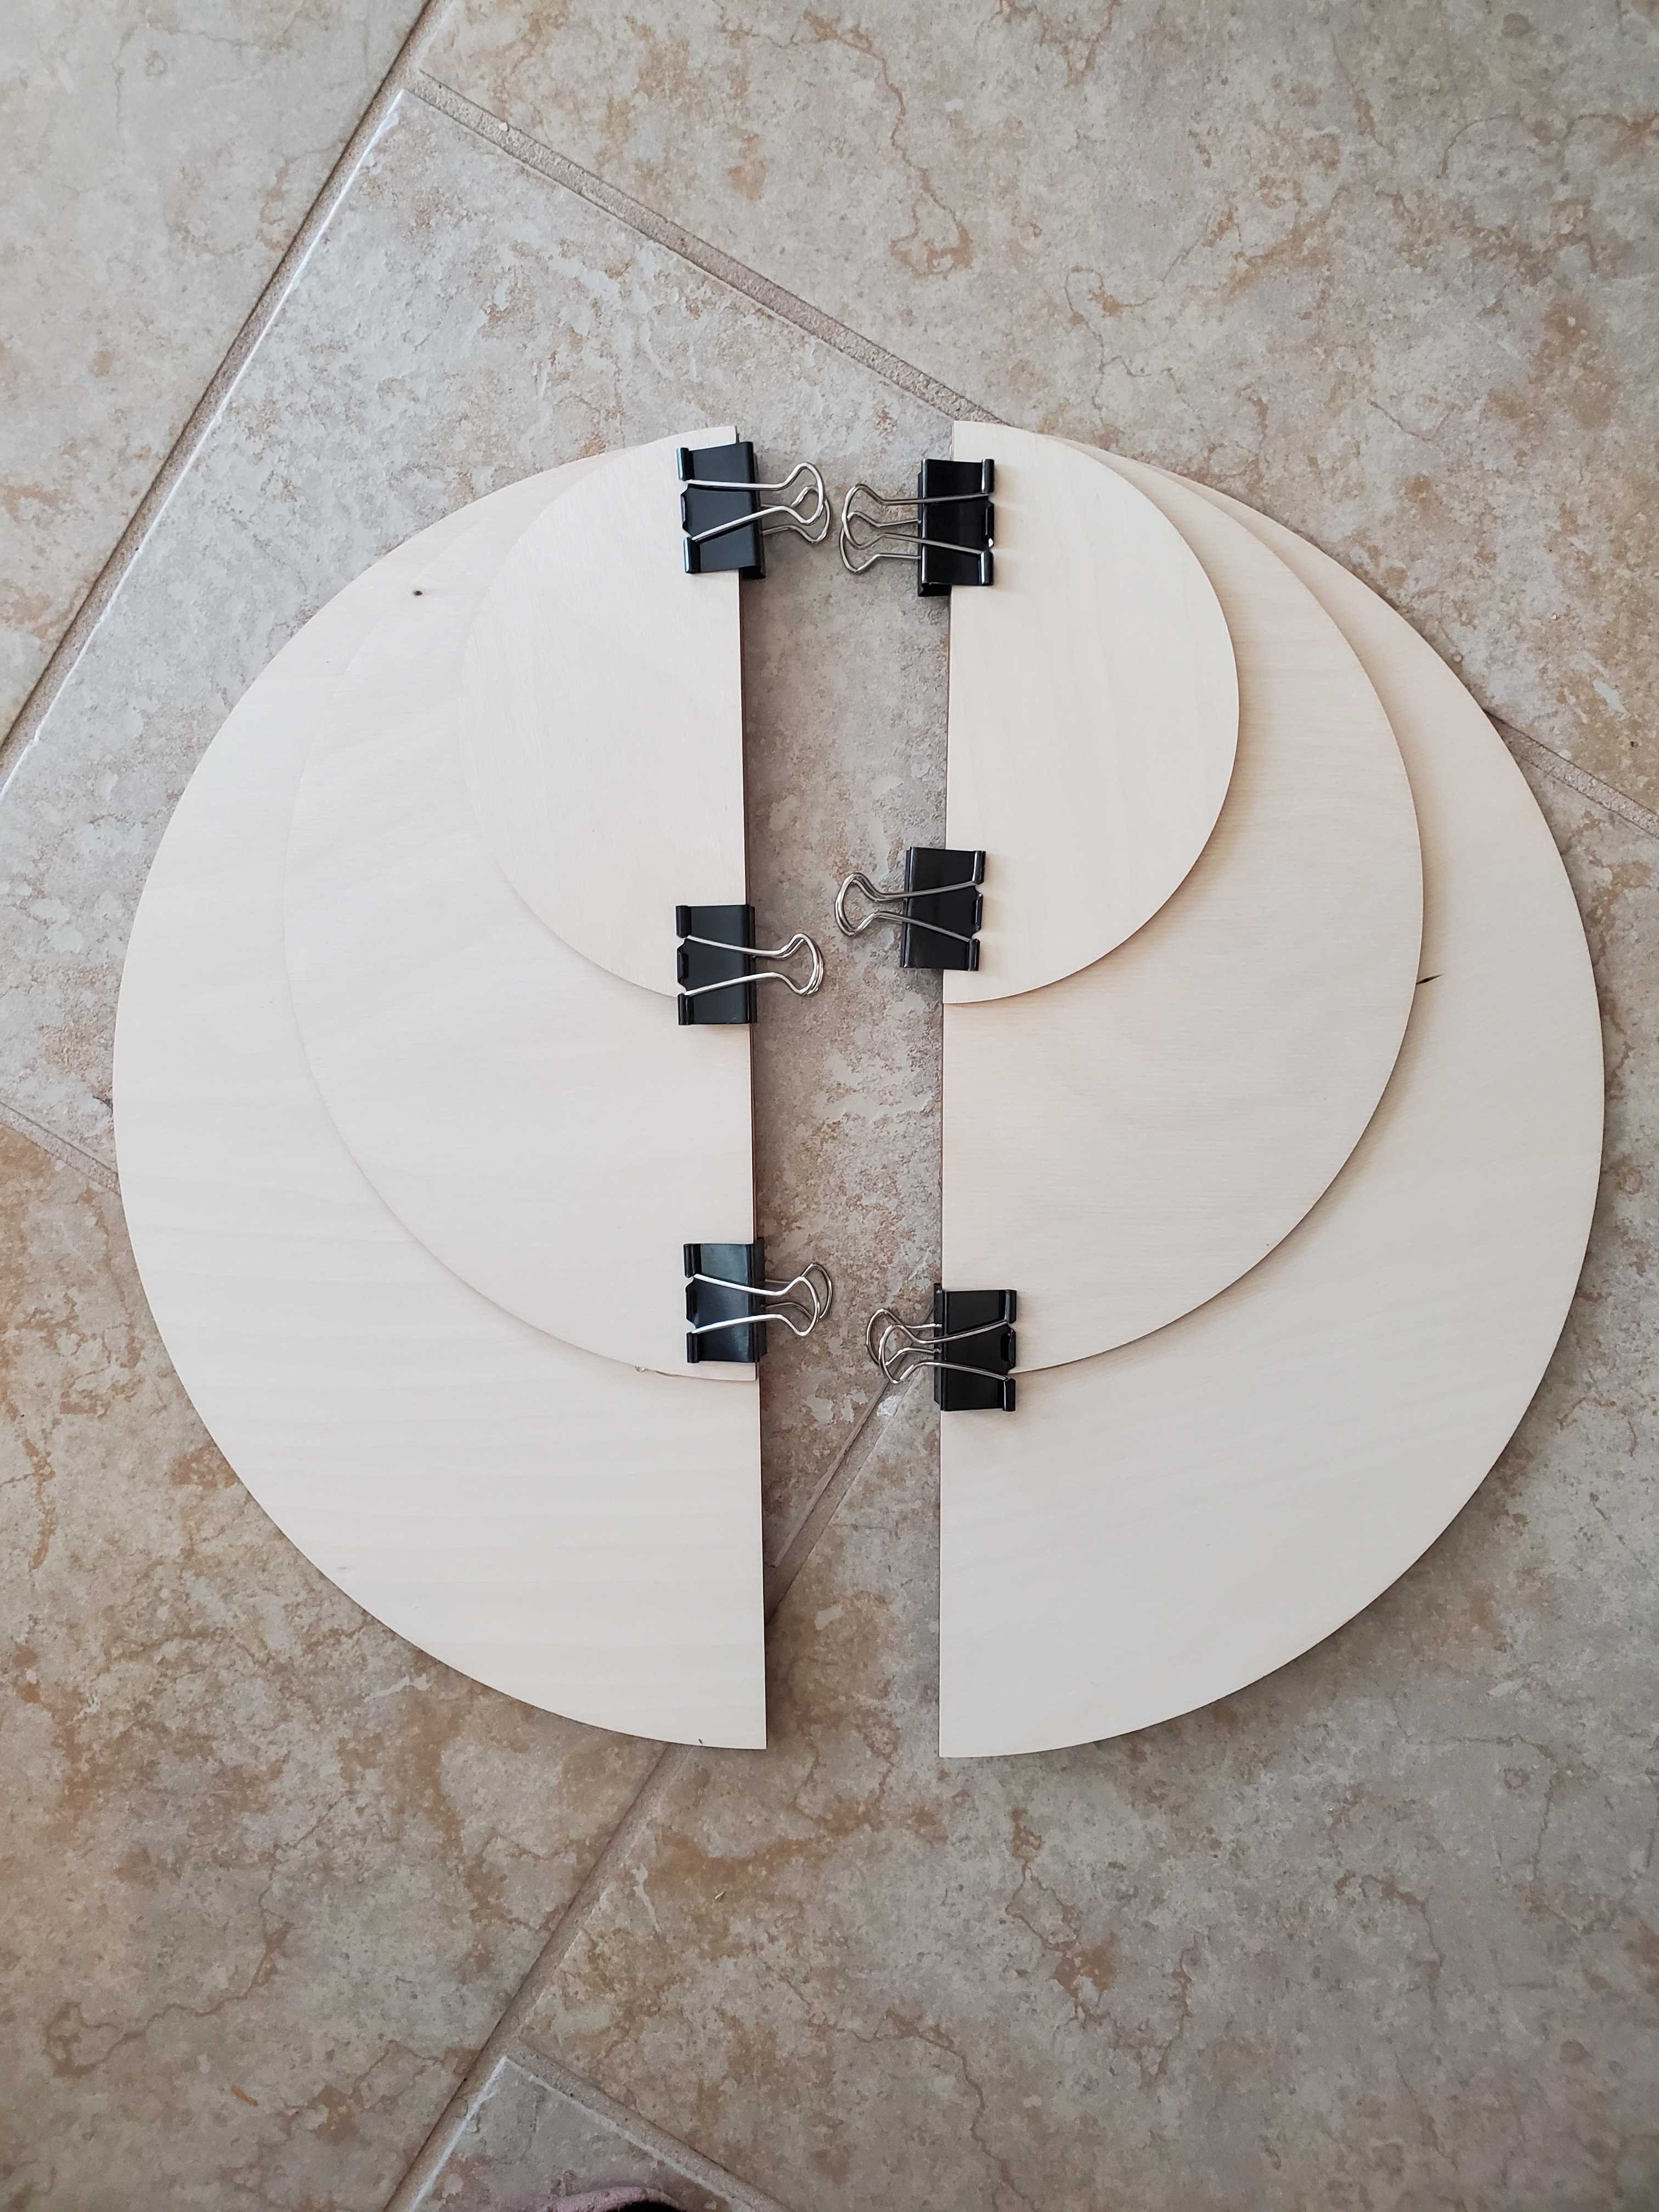
To avoid what I call “faceless cabinets” I decided on a whim to create some grandiose drawer pulls with the $55 left in my project budget. I bought four trios of wooden half-circles in different sizes and waited patiently for them to arrive in the mail.
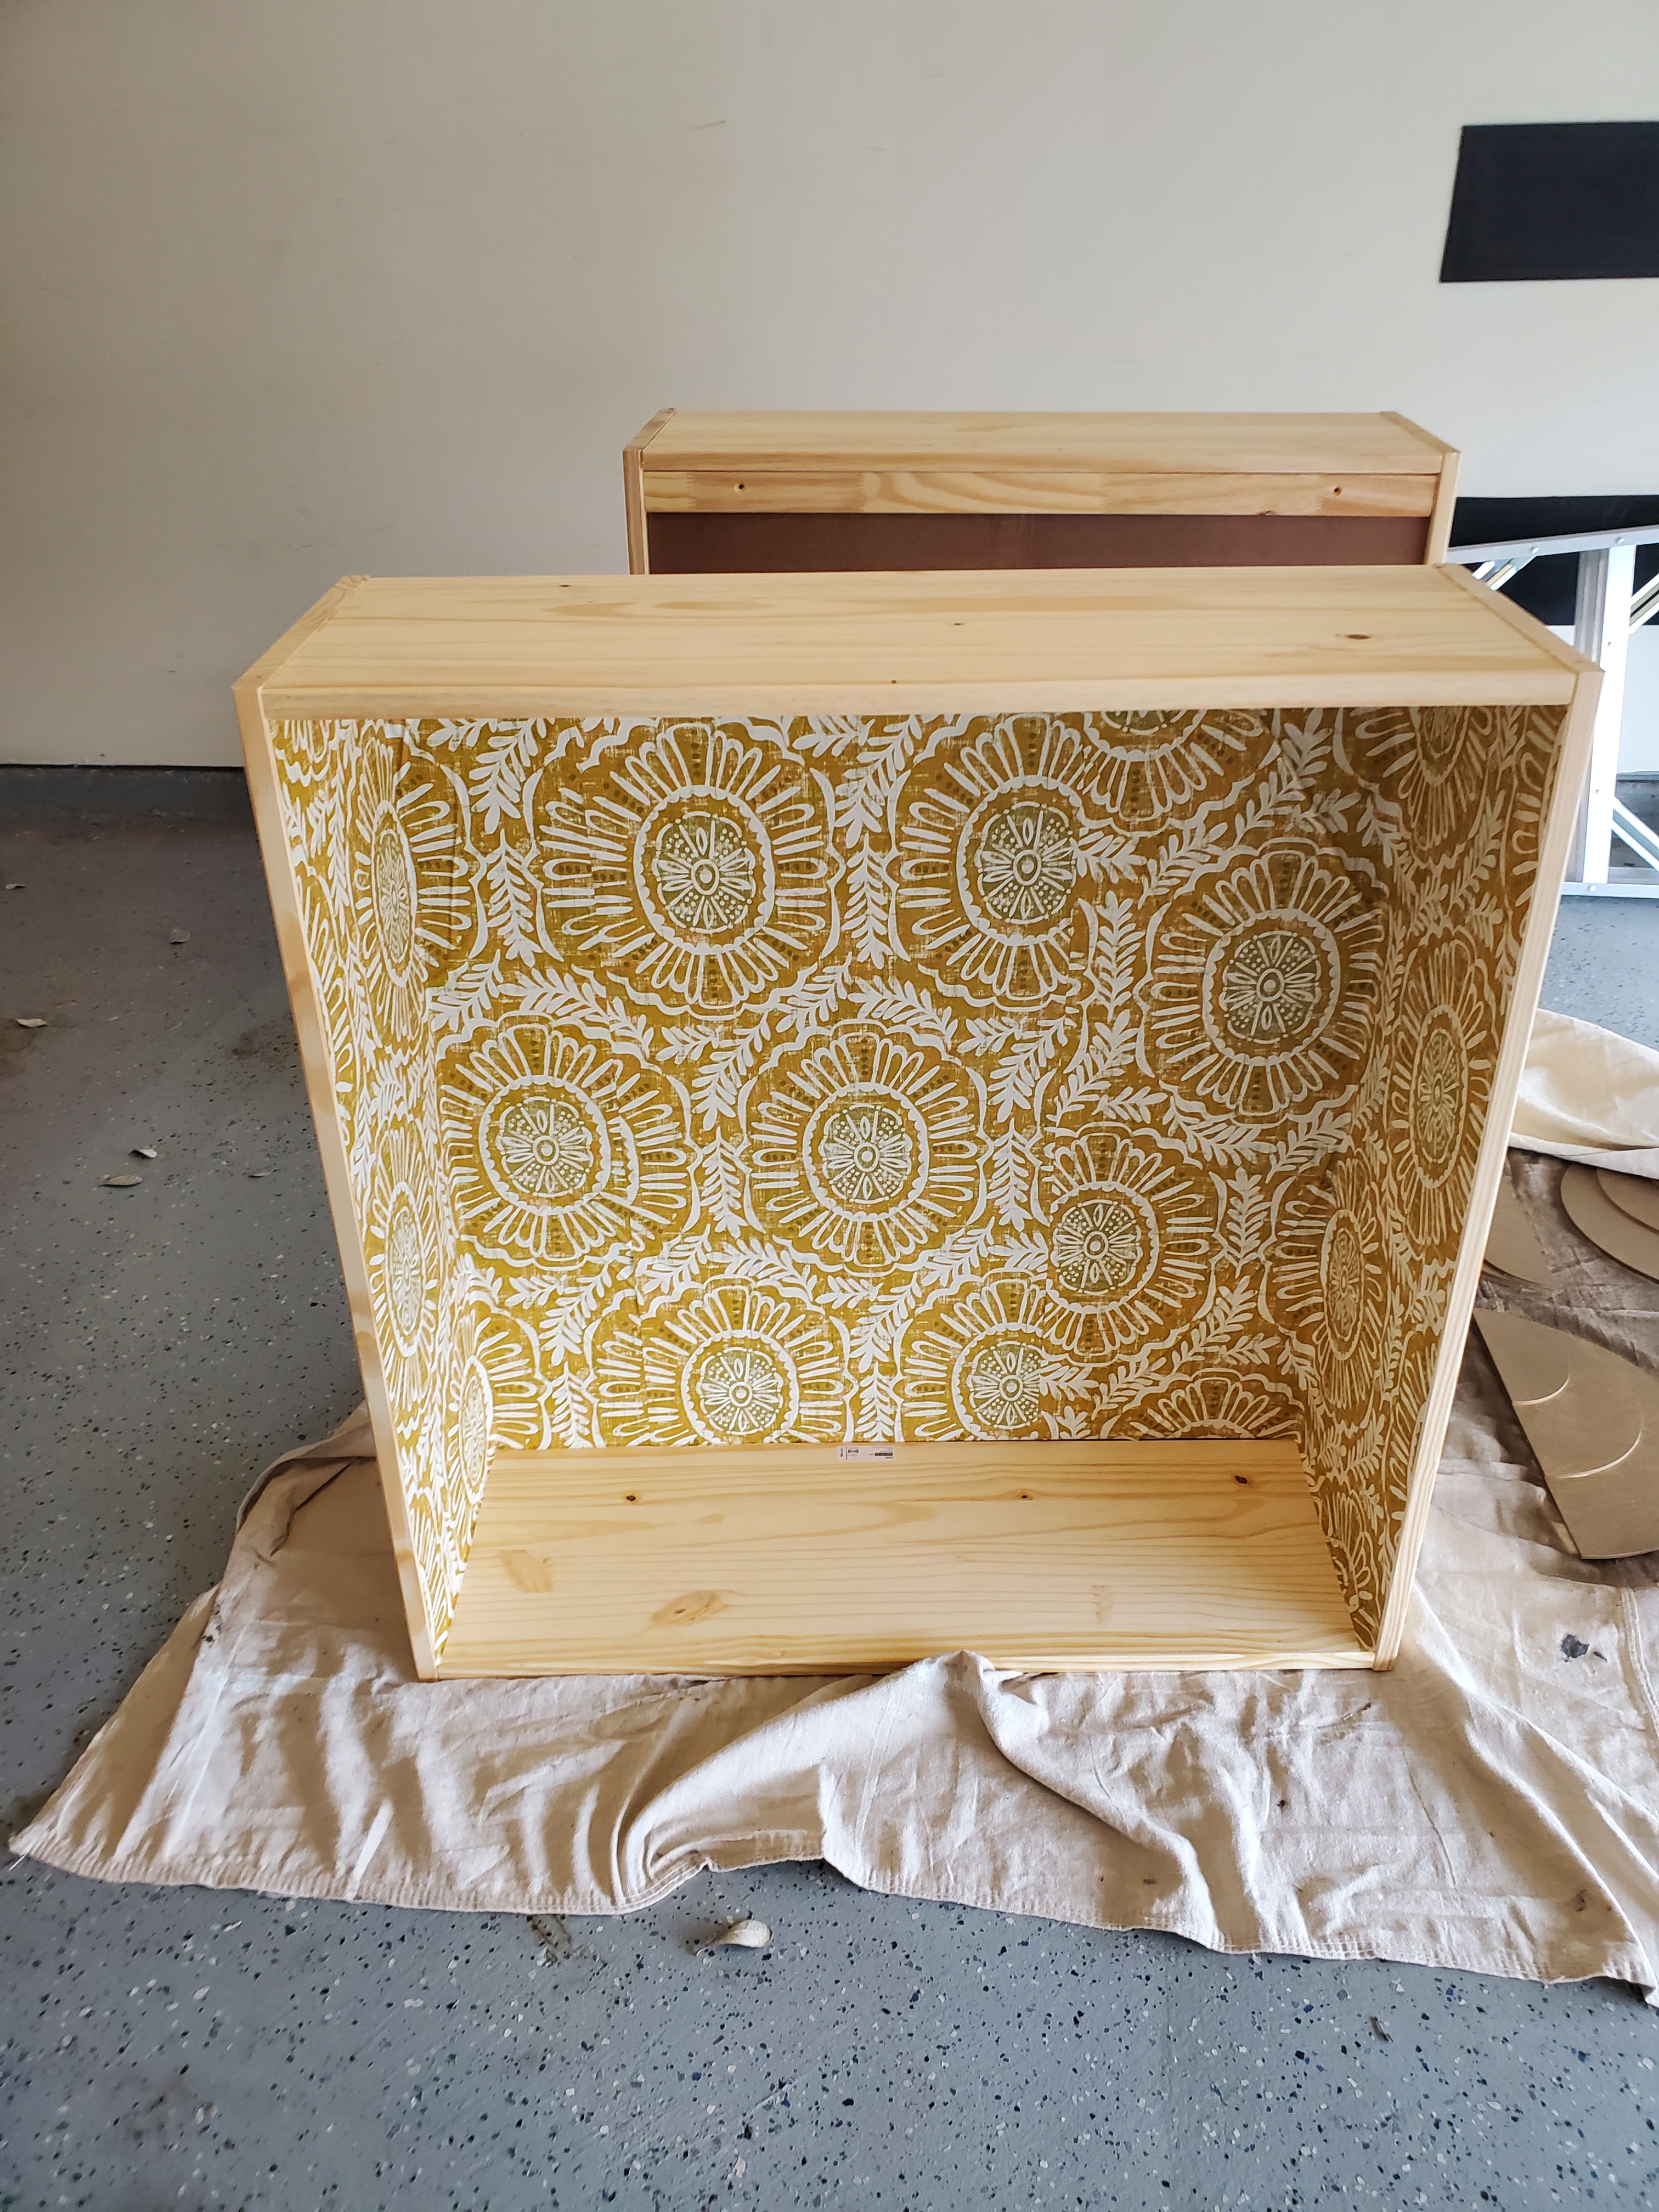
The problem with waiting is that I continue to develop ideas, so… I decided I wanted needed to wallpaper the inside of my cabinets with something bright and cheery. And I also needed furniture legs because I’m not a fan of furniture that floats off the ground.
Luckily my half-circles arrived before I decided that we needed that pull-down wine bar after all.
With everything I needed on hand, I finally got to work.
Here is the supply list for those of you who share my manual labor fetish:
- 2 Ikea Ivar Cabinets
- 1 roll of Wallpaper
- 4 14“ half circles (1/8″ thick)
- 4 10“ half circles (1/8″ thick)
- 4 6“ half circles (1/8″ thick)
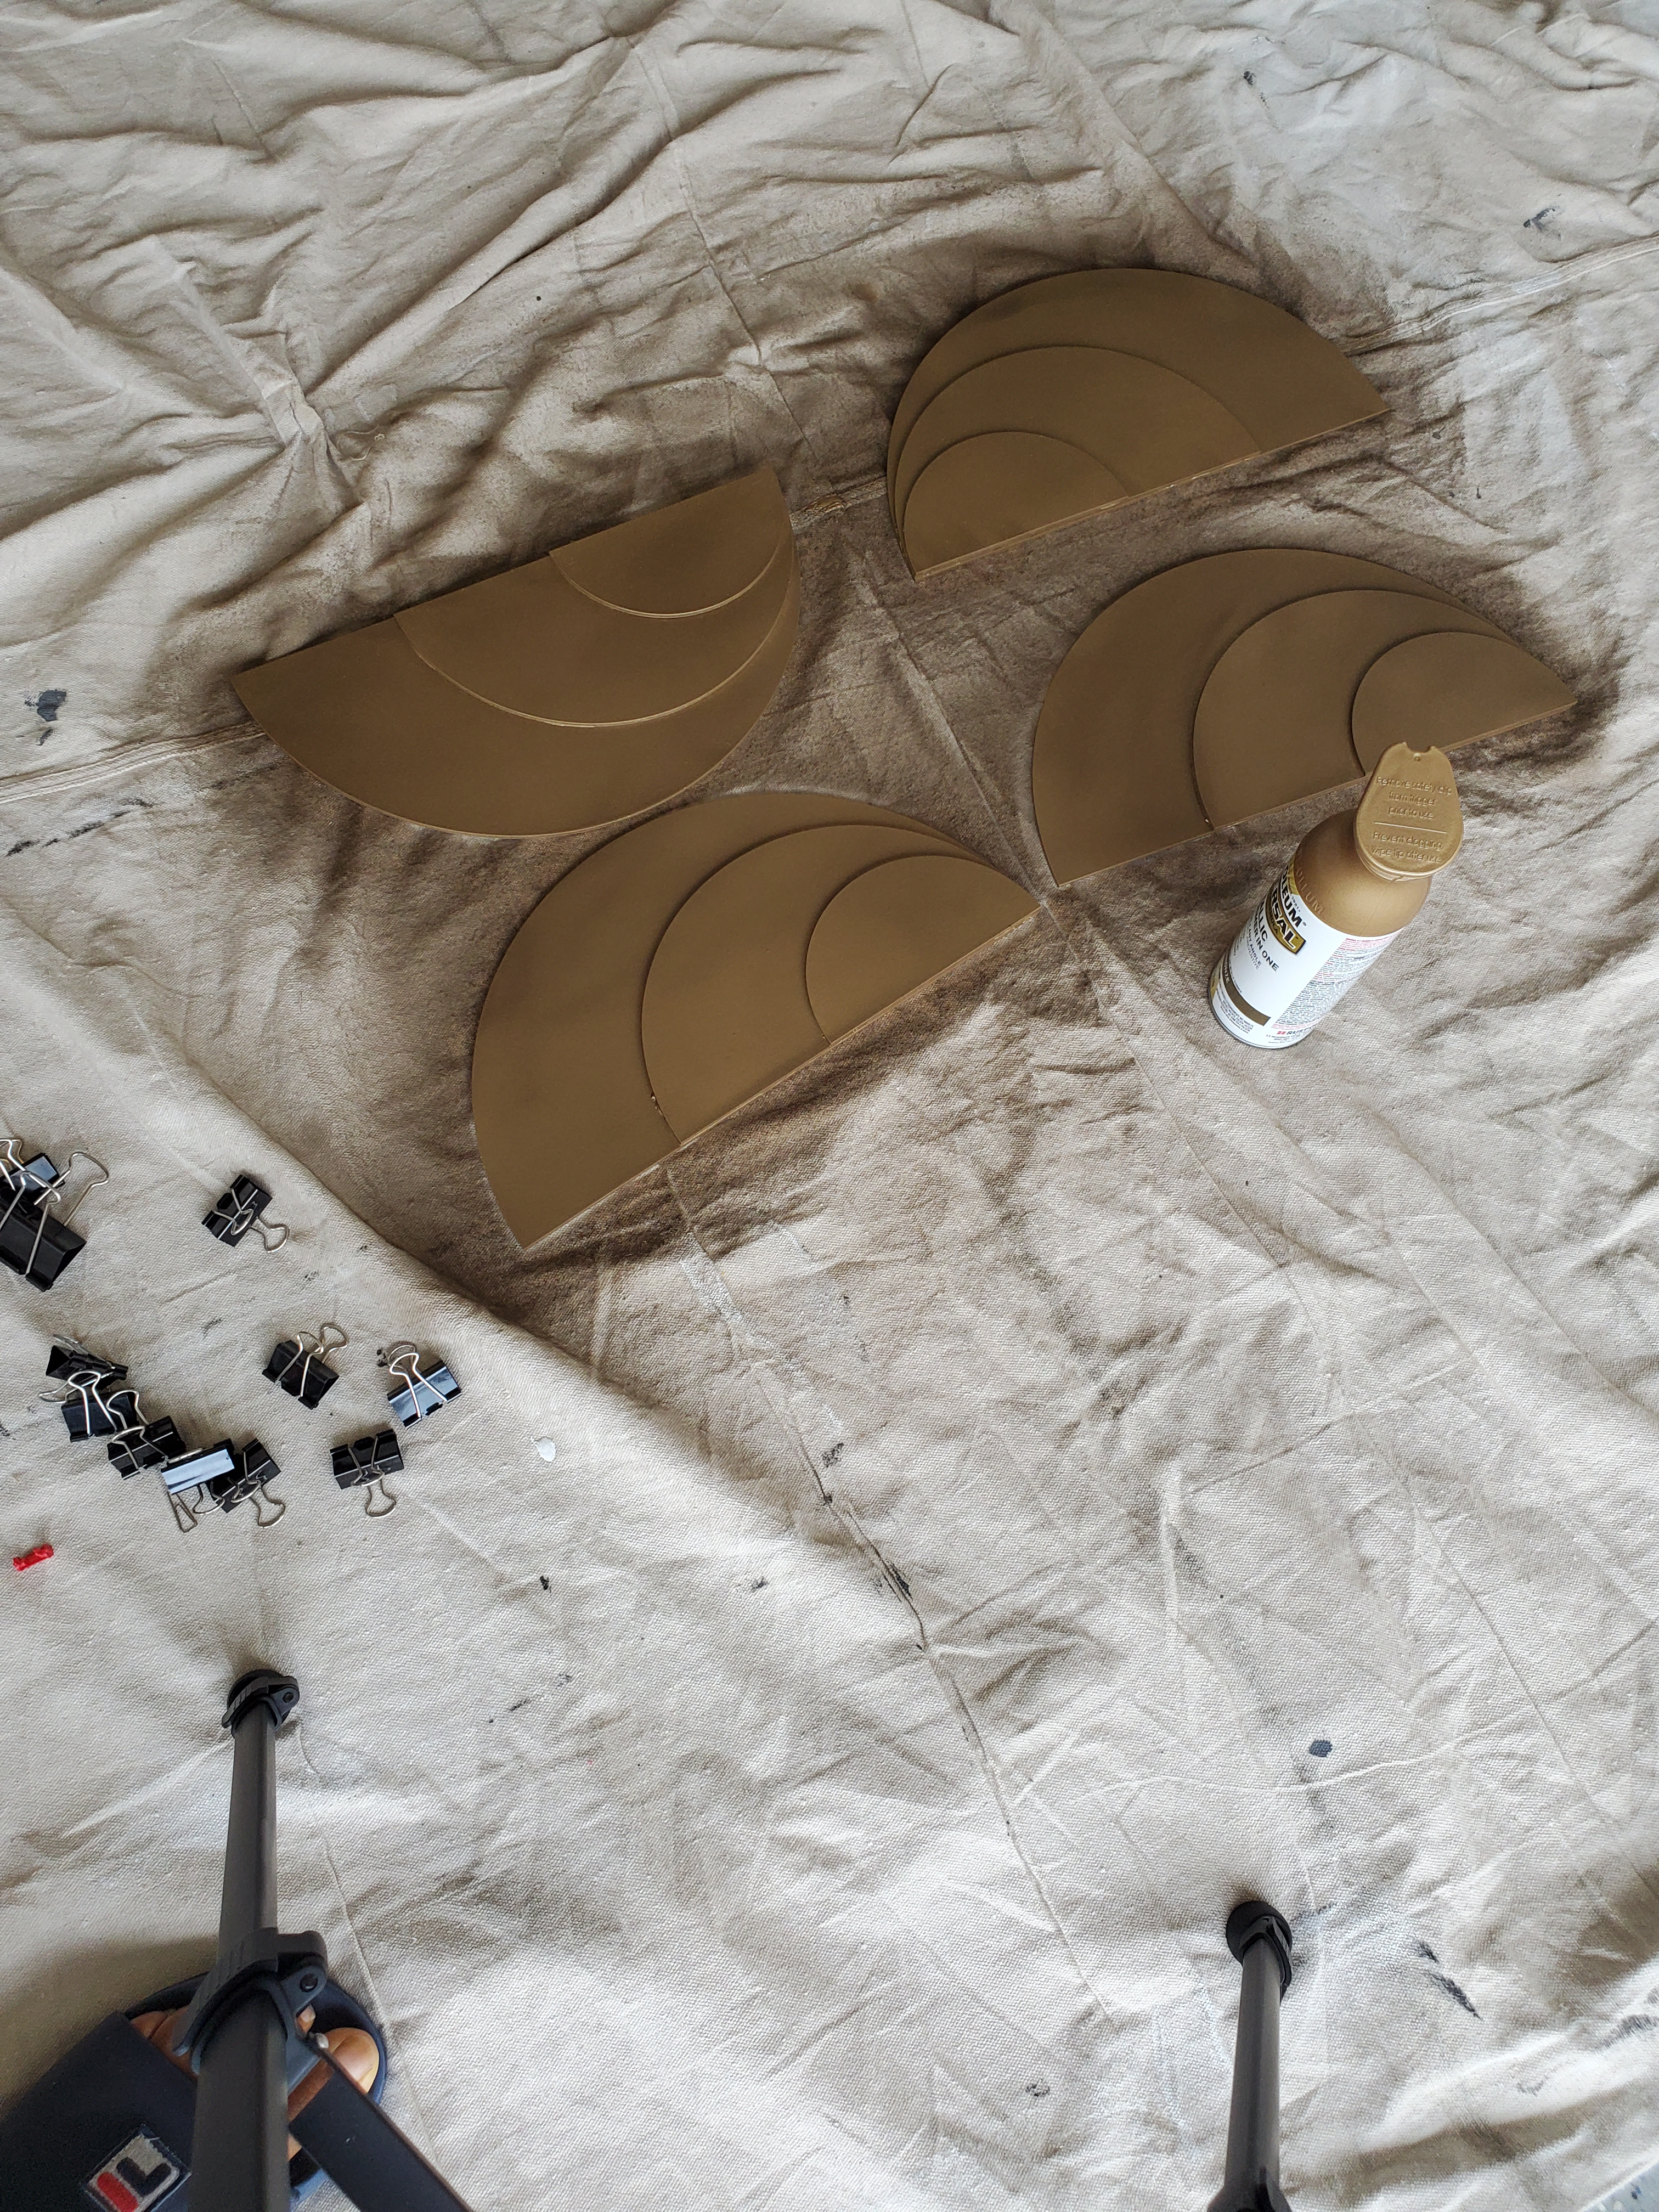
- Super glue (E6000)
- Furniture legs (and screws)
- Drawer Pulls
- Paint (and paint accessories) – SW Wall Street
The tools:
- A drill
- A driver
And the steps:
- Remove the doors and shelves.
- Adhere the wallpaper to the inside of the cabinet.
I have two recommendations here:
(1) Use peel-and-stick wallpaper because the corners are awkward and there’s a possibility you’ll have to redo each section multiple times. Trust me.
(2) Do this step last, not first. Trust me.
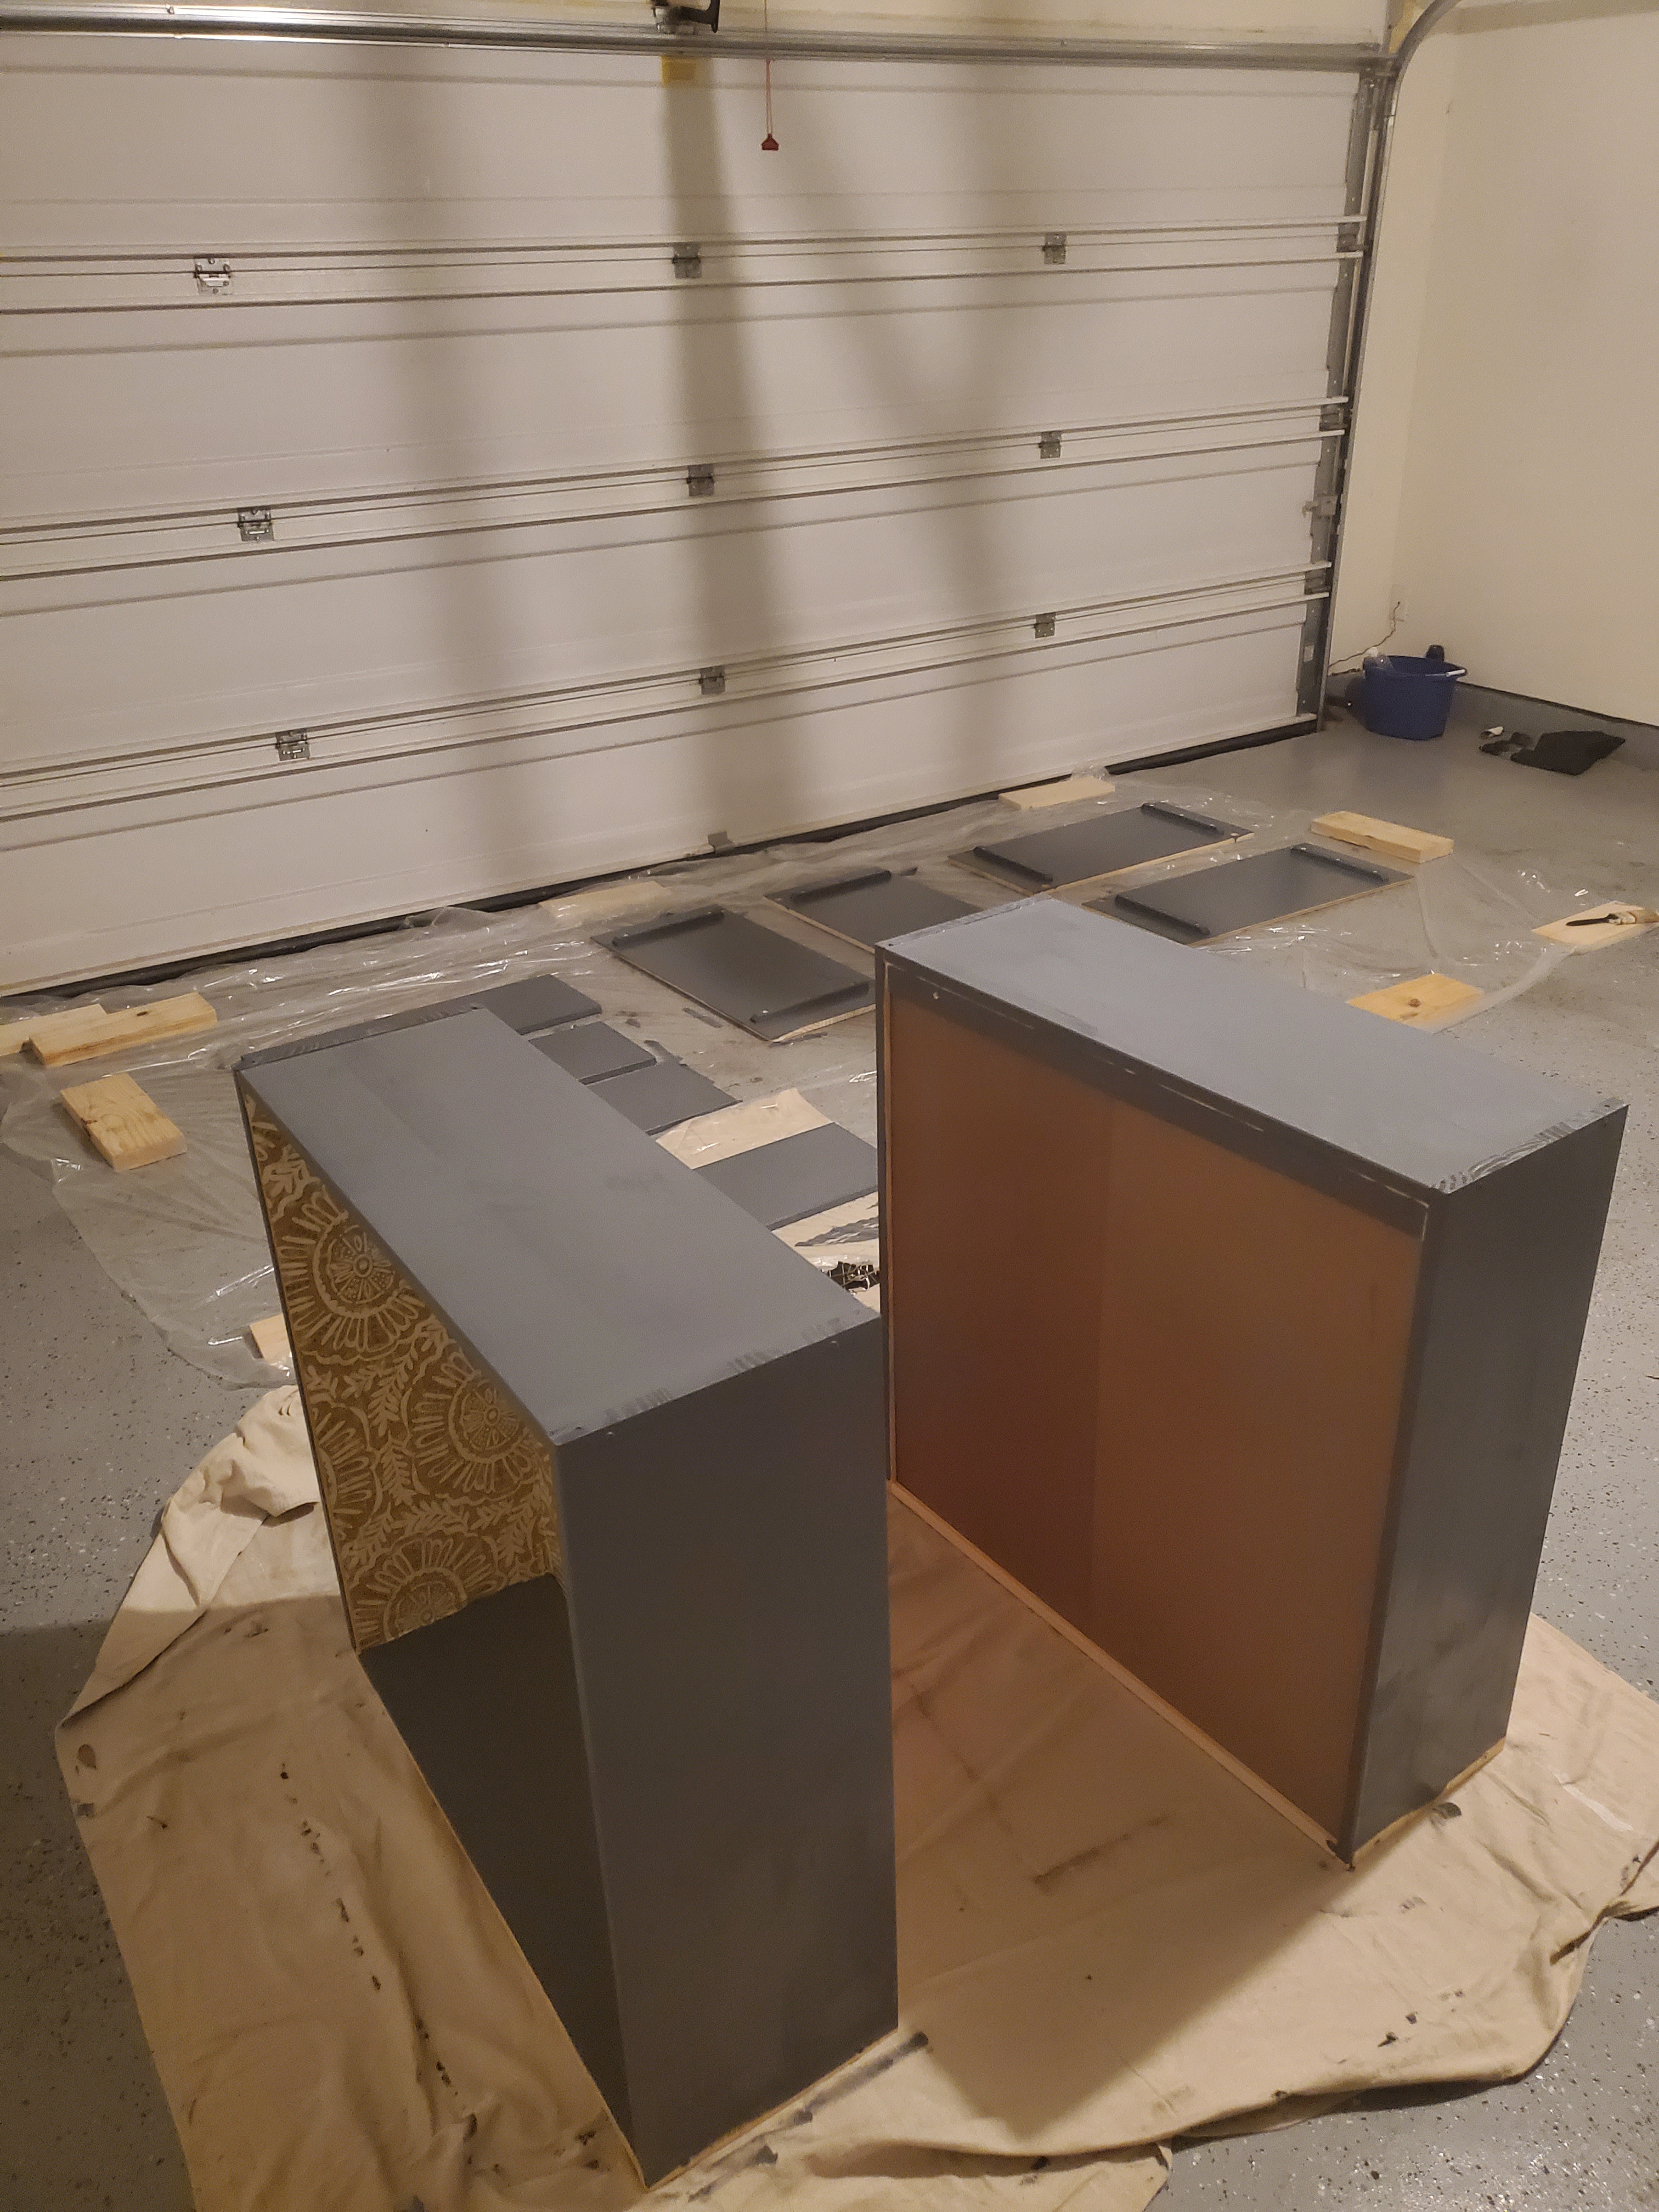
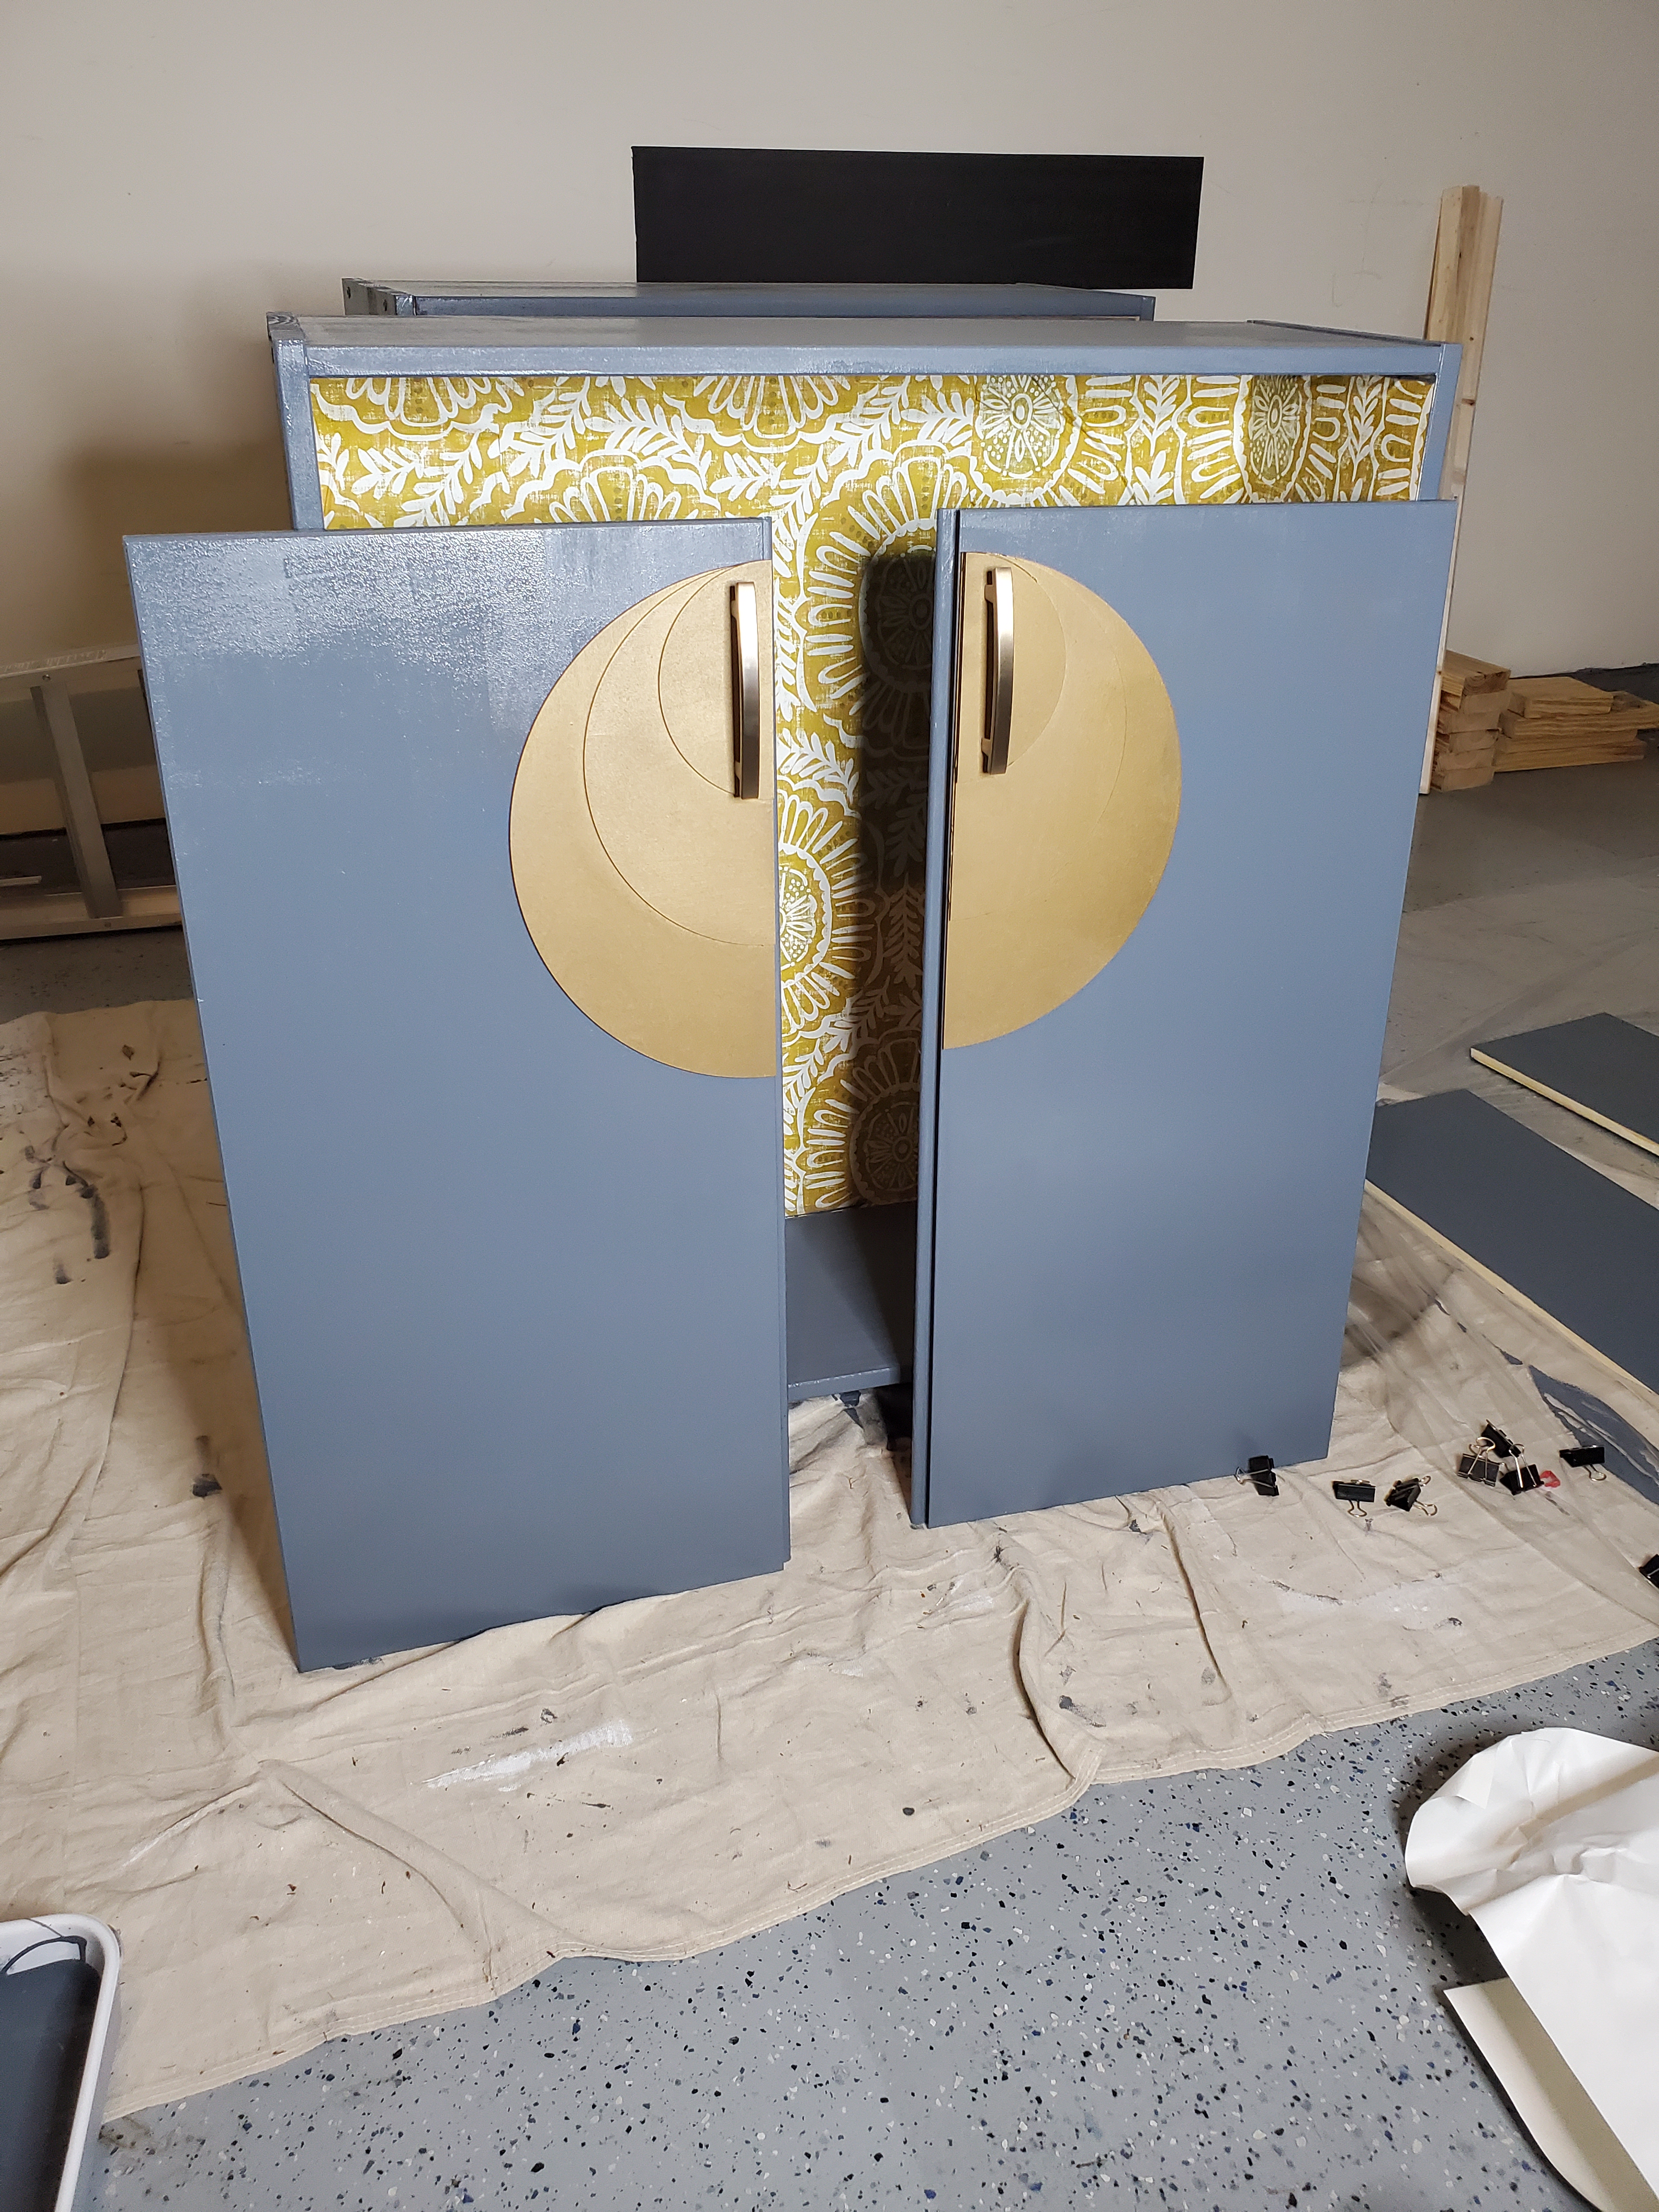
- Paint the anchoring wall, the cabinets, shelves and doors in your color(s) of choice.
- Once dry, flip the cabinets upside down and attach your furniture legs. Then immediately flip them back over, because it’s the sane thing to do.
- Stack and glue the half circles together and let the glue set. Paint when dry.
- Glue the half circles to the cabinet doors and then drill holes through your beautiful design. This is the point of no return, so make sure you measure as many times as you need to to ensure your holes are in the right place for your pulls!
- Attach your pulls to doors, then reattach the doors to the cabinets.
- Slide your shelves back in, and shove all your kids’ junk in there.
- Take all the junk out because you forgot to take pictures while things were still pretty.
- Shove that junk back in there.
PUBLIC SERVICE ANNOUNCEMENT
The Ivar cabinets must be secured to the wall. If unsecured, when you open one door the entire thing will tip over. I am not telling you what might happen, I am telling you what will happen.

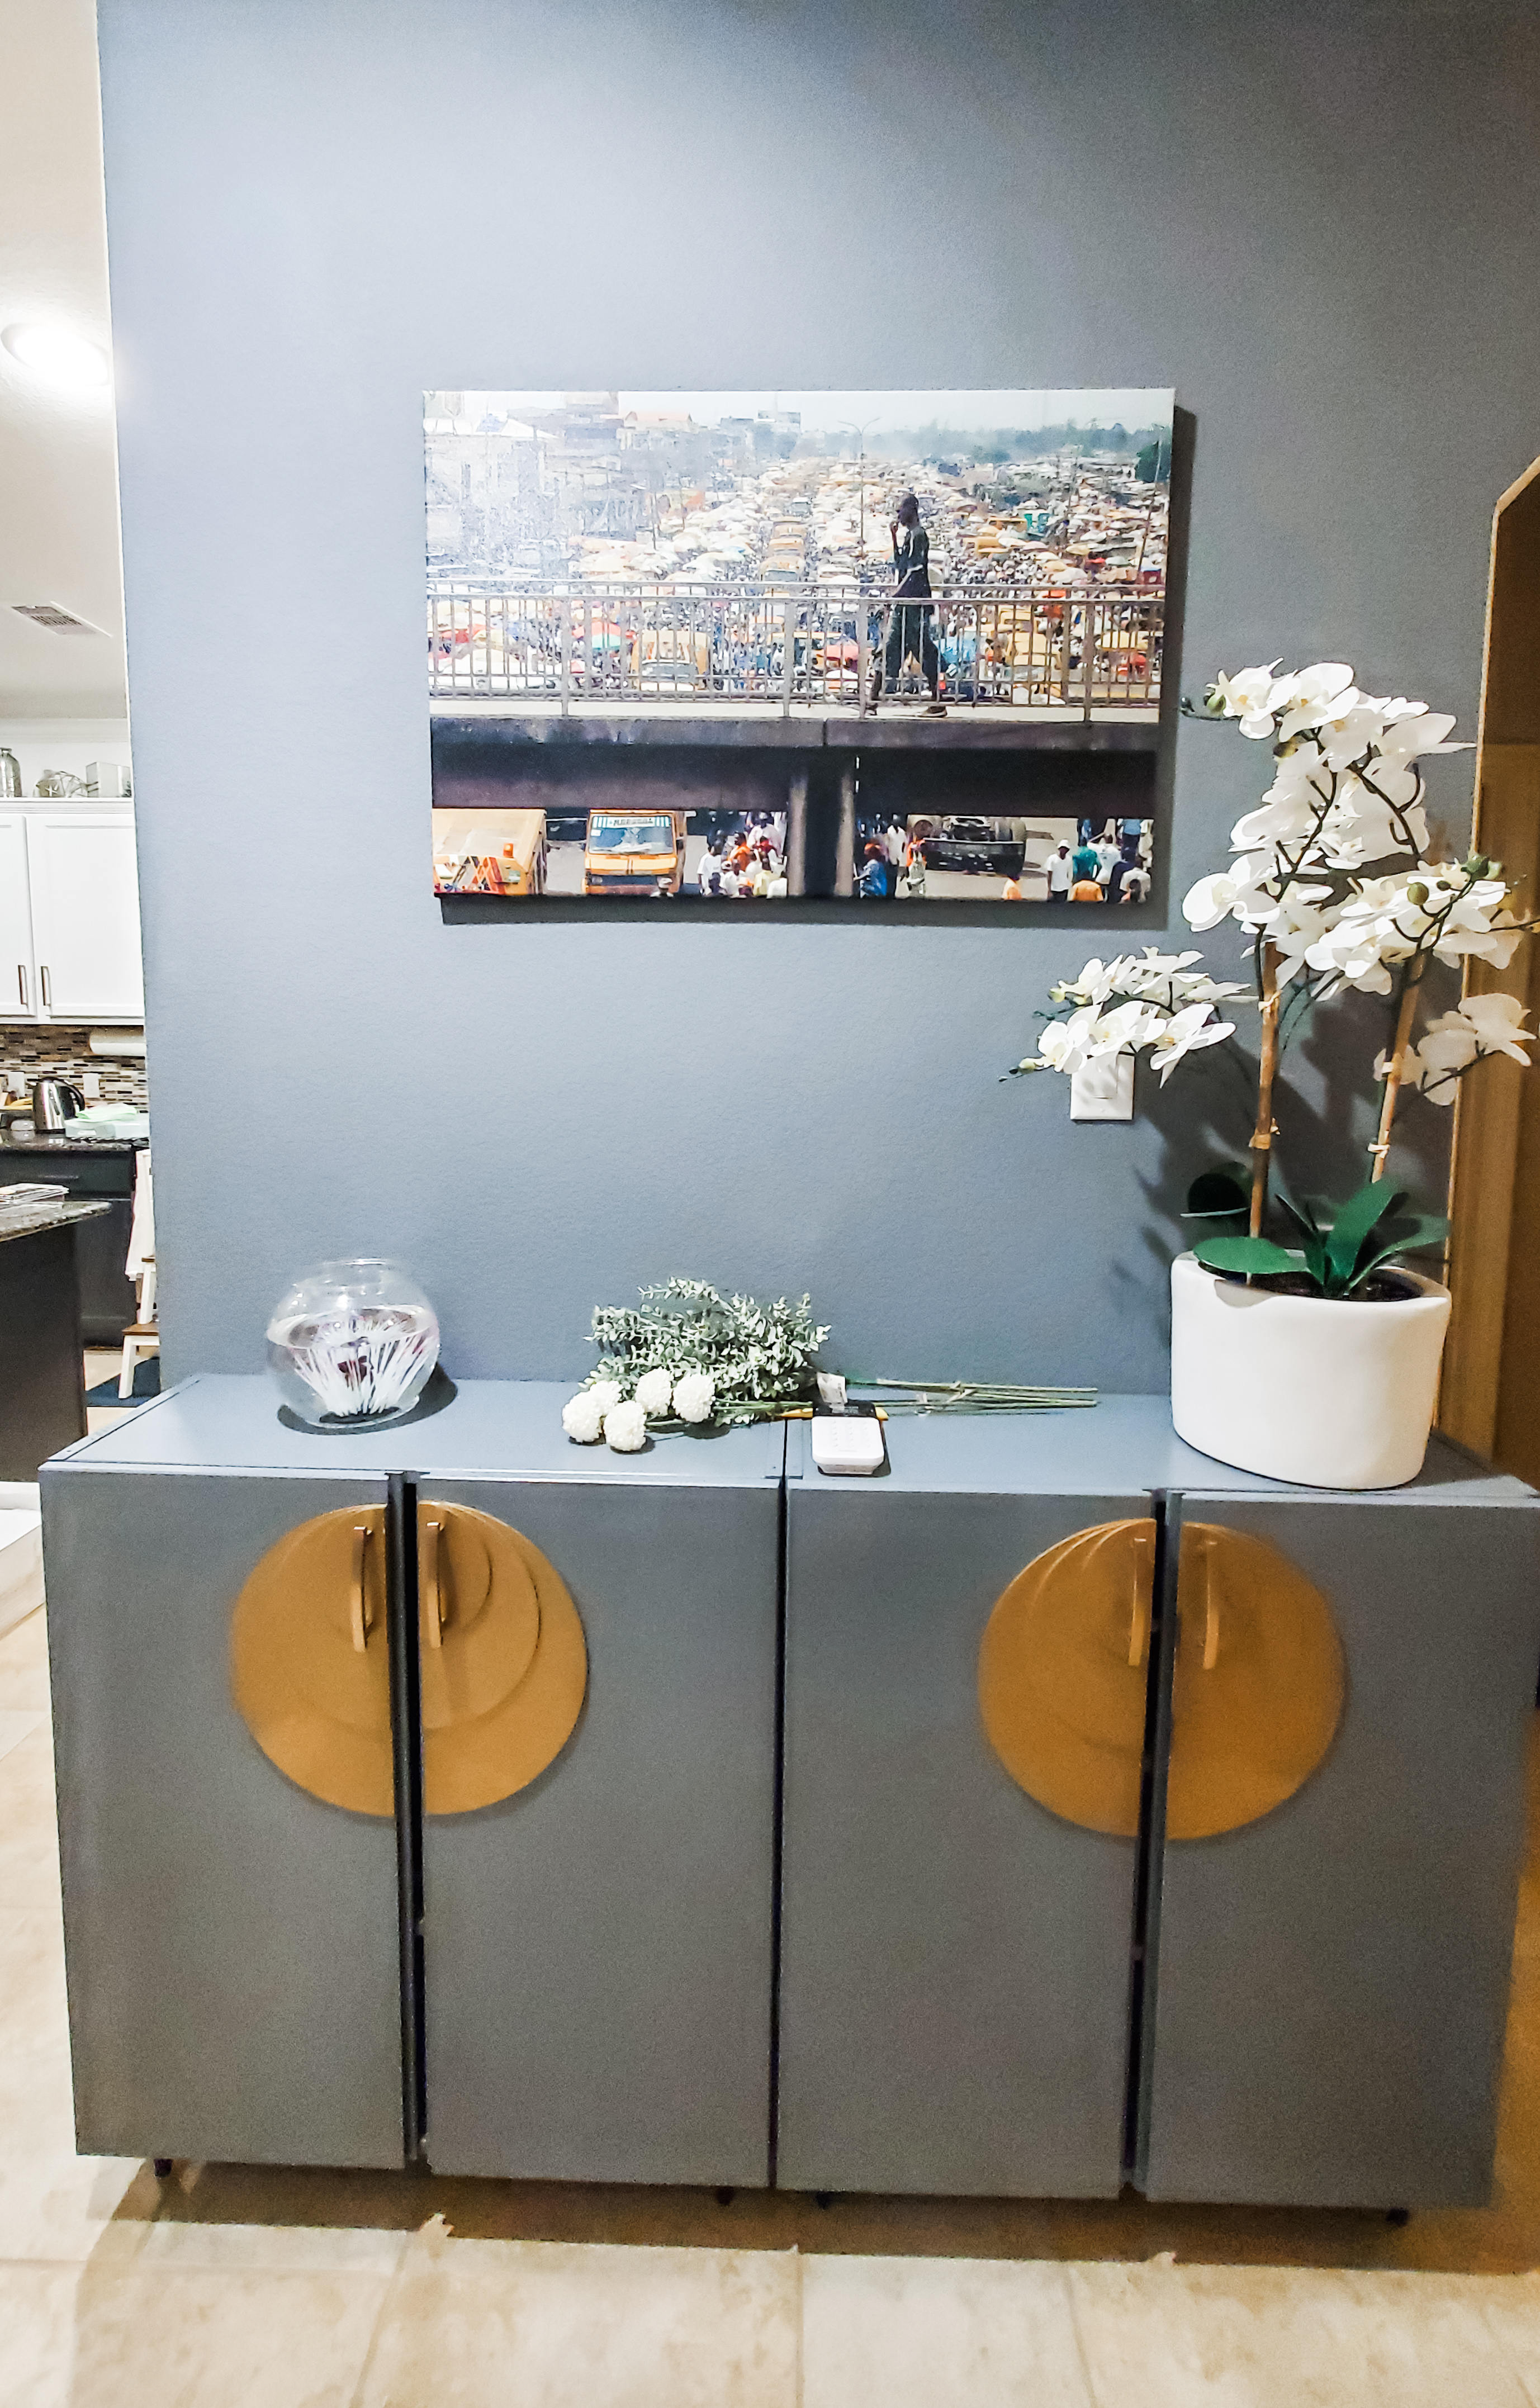
Anywho…my initial junk storage problem is solved, but I now have the problem of how to style this thing. I currently have an arrangement of orchids, Mister Fishy’s bowl, and our infamous Oshodi picture as the anchors. Any suggestions on how to make everything look cohesive?
If a description of our “style” will help you make a recommendation, I’d say our home is “moody eclectic-boho-glam, with a touch of city-industrial-farmhouse chic.” Help!
Have Fun!

Don’t forget to like, share and subscribe to stay up to date with all the happenings at PaperDiem headquarters!
Want the 'how' after the inspiration?
The WanderHome newsletter is where you'll find more in-depth guides, design notes, and a few life updates to help daily life feel a little softer.
I'll send my Home Health Checklist to help you pinpoint what already works and what's quietly causing you stress in your home.

Hi, I’m Chioma — a spirited explorer and interior designer with a soft spot for a full table. I help travel-lovers bring that vacation feeling home through travel-inspired design, simple hosting rituals, and storytelling that makes daily life feel richer. Read more…