")


Some of the articles on Casa Diem Life may contain affiliate links. If you click and make a purchase, I might earn a small commission at no extra cost to you. It's just one way we keep the journey going! Find out more in my Privacy Policy.
Today I was supposed to be writing about a quick upgrade that can transform even the blandest of spaces with very little effort. However, in my hurry to get it done I committed some pretty big decorating no-nos, and this story has now become a cautionary tale.
But first, the back-story!
I recently removed a safety gate that separated my home office from the playroom.
Well, that’s only partially true. One day, in a fit of passion, the Chief ripped the gate straight out of the wall and left behind four gaping holes and a sad looking husk of a gate. I removed what was left of the gate and stared at an oppressively blank wall for two weeks.
I won’t list the thirty-seven ideas I had for that wall. I’ll skip to the part where I decided on printing some family photos and calling it a day.
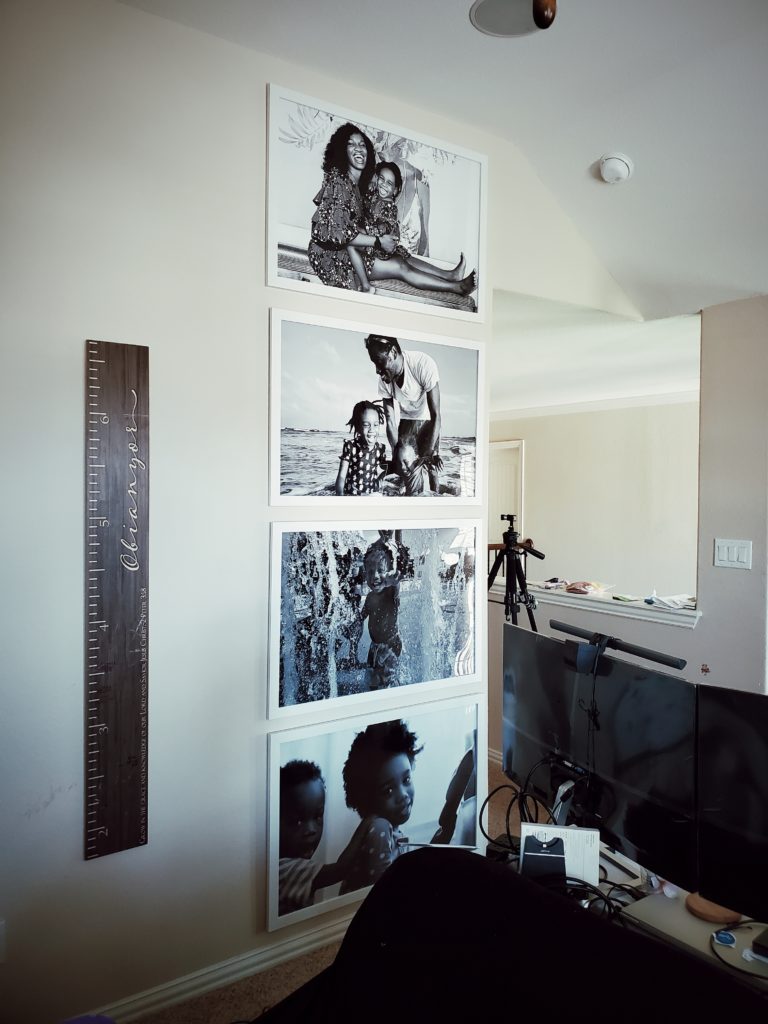
I’ve printed my own photography tons of times, so I acted without thinking. I wanted the photos fast, so I immediately sent the images to Walgreens Photos to print. That was my first sin: printing without first color adjusting.
Nine times out of ten, images look noticeably darker in real life than they do on a computer screen. Especially black and white photos. One of my images was printed so dark that it looked like a solid back poster with a sliver of light in the top left corner. I had to spend extra time and money reprinting and reframing it. Boooooo.
The easiest way to avoid this is to turn your screen down to half brightness, and then increase the exposure on your photos ever so slightly.
In layman’s terms, make the picture brighter. After printing the images will look more balanced.
The second sin that I committed was making the assumption of uniformity.
I only measured one of the four “identical” frames that I had purchased for this project. I sketched out a grid for the gallery wall, and made calculations about nail placement based on the position of the hanging hardware on that frame.
I then marked my grid on the wall and happily banged in all eight of the required nails, smug as I could be.
I had no issues hanging the first frame, then it was all downhill from there. Or uphill, depending on your view of the world.
I realized my mistake and measured the hanging hardware on the second frame, pulled out all the nails, recalculated my grid, and then banged all the nails into their new positions on the wall.
I had no issues hanging the second frame… but If you’ve guessed that the third frame had different measurements from the first and second frame, you get a gold star!
Every. Single. Frame. Was. Different.
At the end of the day my wall looked like it had been under machine gun fire. Luckily, the prints are large enough to hide my sins. Learn from my pain, friends. Measure everything individually.
Tell me what you think about this rather grand gallery wall.. Do you love it or do you hate it? If you decide to recreate this please share! Send me a link, tag me on social media or send me an email. I love to see what we are all creating.
Oh, by the way, the frames are the Belmont Frames from Michaels, and the photos were printed in 24×36” at Walgreens. wink
As always, have fun!

Want the 'how' after the inspiration?
The WanderHome newsletter is where you'll find more in-depth guides, design notes, and a few life updates to help daily life feel a little softer.
I'll send my Home Health Checklist to help you pinpoint what already works and what's quietly causing you stress in your home.

Hi, I’m Chioma — a spirited explorer and interior designer with a soft spot for a full table. I help travel-lovers bring that vacation feeling home through travel-inspired design, simple hosting rituals, and storytelling that makes daily life feel richer. Read more…